Do you have poor impulse control? Do you want to time-restrict your access to items not greater than 125mm square and 200mm in height? Well, this could be just the thing for you.
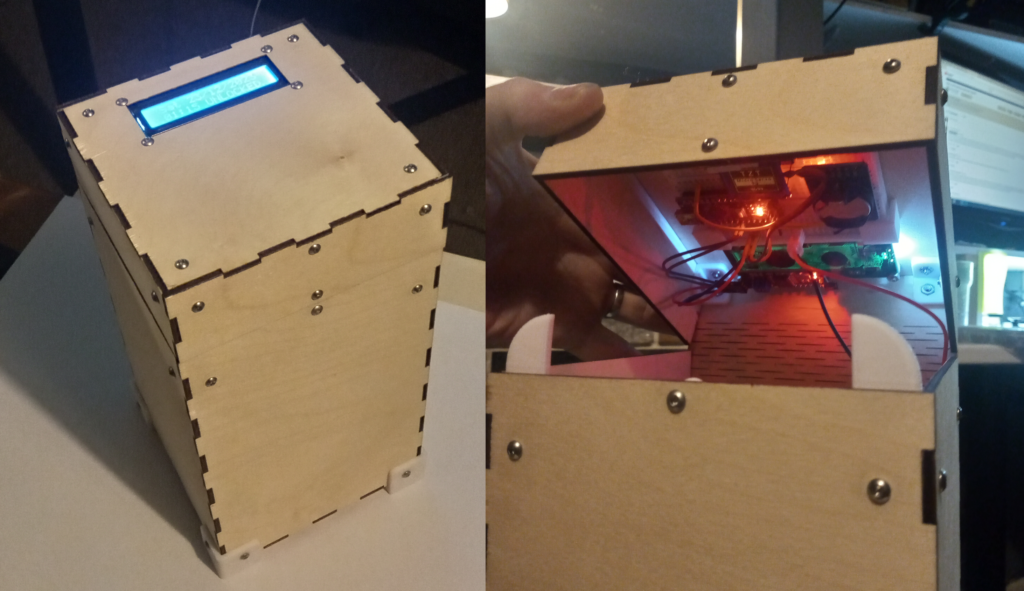
As the title suggests, this is a timed lock box that will only unlock during pre-determined time periods.
Intro & Background
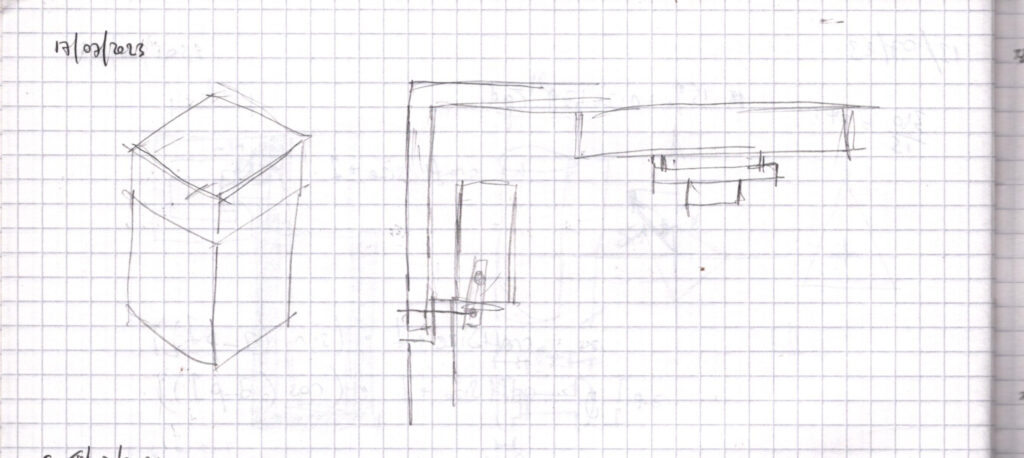
The first instance of this idea entering my head was on the 17th July 2023 with a small sketch in my book that resembles a box that locks. There is no doubt that the addition of the laser cutter a couple of weeks prior had some influence in this.
What galvanised this idea in to a full blown project was the desire to construct it for my sister as a secret Christmas present. Therefore, on the 3rd December 2023 this project was started with a mere twenty days to complete.
All the box requires is some laser cut ply, 3D printed parts and an Arduino with a couple of peripherals. These are all things that I have experience in, so I uttered the famous words, “how hard can it be?”.
Design
Due to this being a secret present, the contents of the design brief was solely at my discretion, and thus changed daily. However, there were three key needs that must be met at all times:
- The box must unlock at 17:00 on any Friday and then re-lock after 23:59 on the subsequent Sunday.
- The box must be delivered flat-pack and be able to be assembled with simple tools.
- The box must be able to accommodate a 120mm diameter cylinder that’s 200mm high.
Features and designs that didn’t make the final cut include the following:
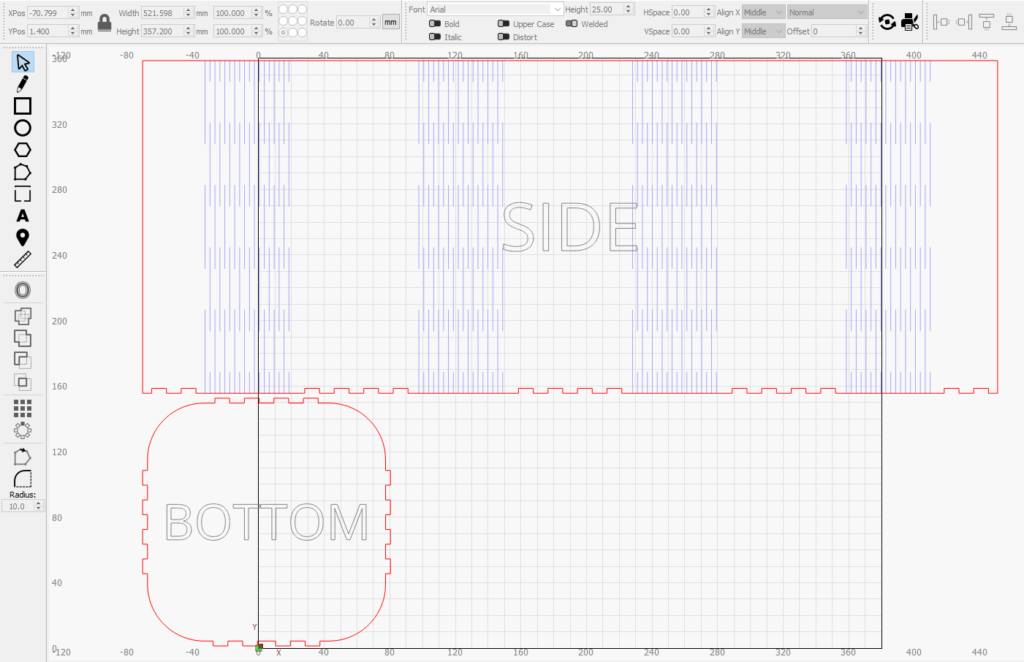
- Rounded corners to make the box look less ‘boxy’. While this looked great, the design required the sides to be cut as a single piece which was greater in size than the bed of the laser.
- An RGB LED to indicate if the box was locked or open. This was replaced with an LCD display which would show the current time and date.
- Battery power was ruled out for safety and complexity reasons.
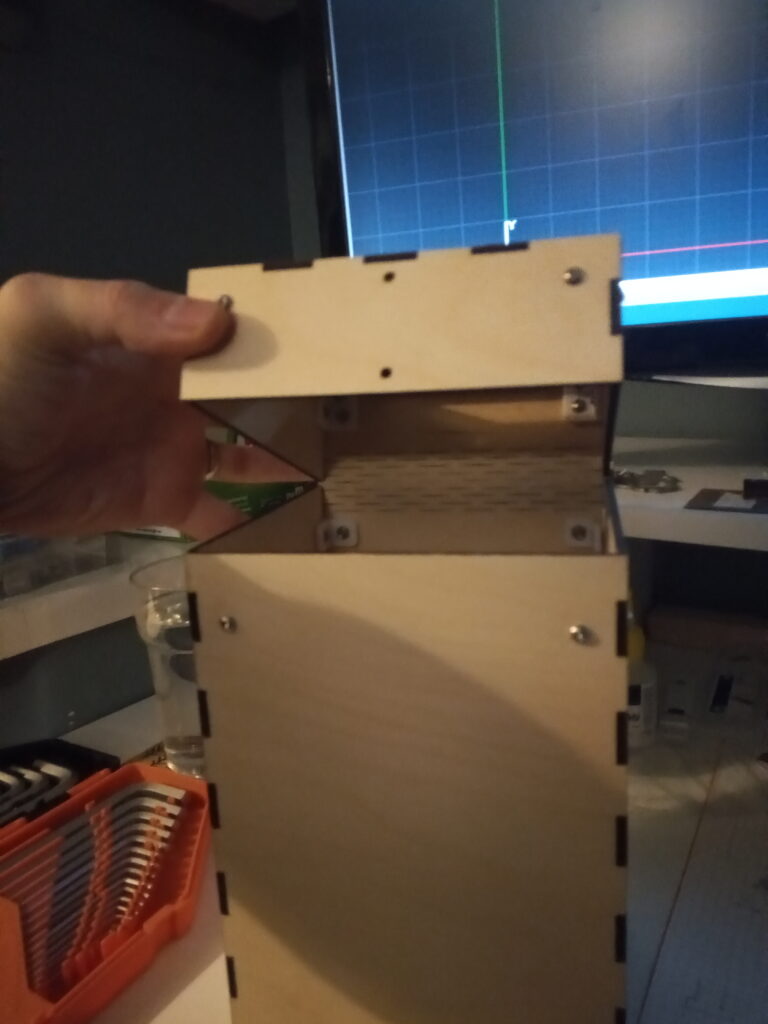
The final design incorporated a laser cut sprung hinge. This solved the potential issue of the user accidentally leaving the lid open. In addition to this, the hinge is simple and built-in, and therefore requires no additional components nor any assembly.
Unfortunately, this hinge placed additional forces on the material used to make the box. Normally the super-glue would be out, but that would contravene one of the ‘key needs’, so additional 3D printed braces were required to support the bending points.
The template for the box was generated using the online web-app: MakerCase – Easy Laser Cut Case Design
Electronics and Code
Hardware
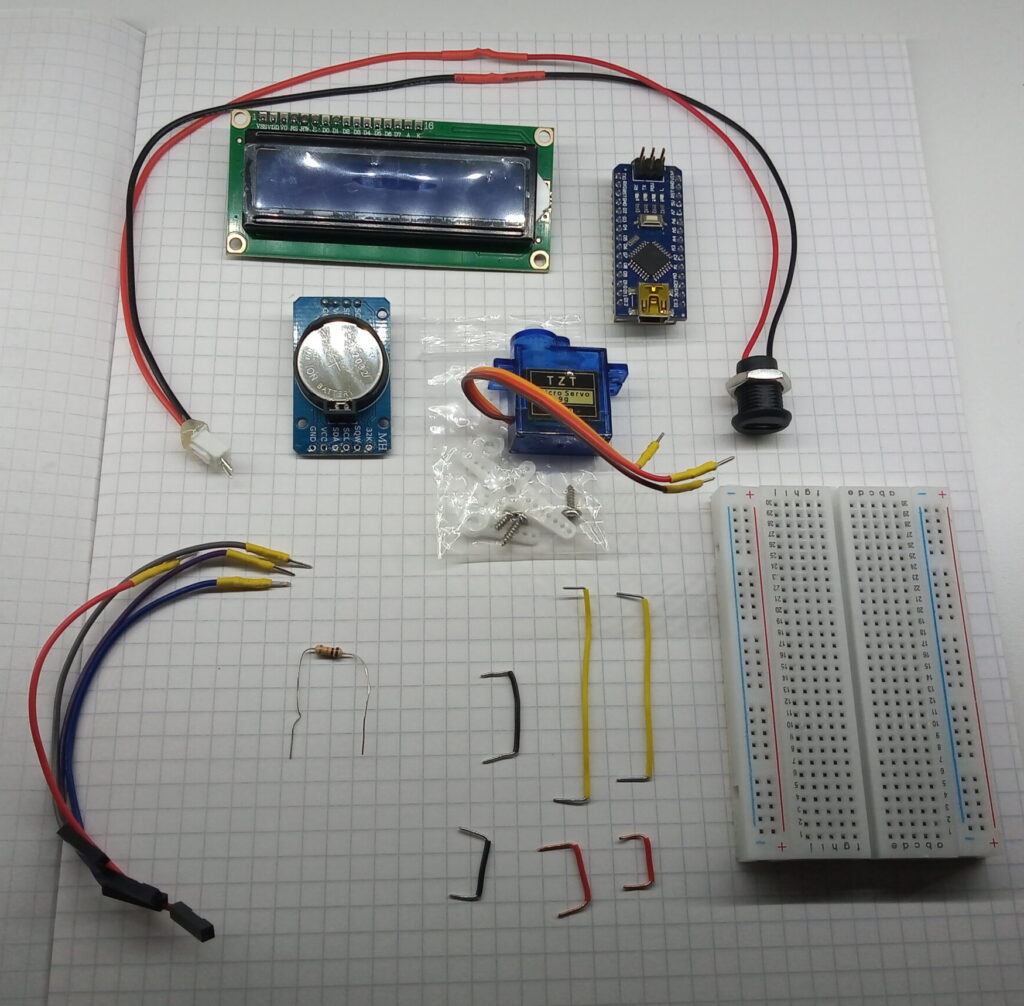
The hardware of the project was relatively simple and consisted of the following components:
- Arduino Nano
- Small breadboard
- DS3231 RTC
- SG90 Servo
- 1602 LCD with I2C backpack
- USB-C panel mount socket
- Various wires
- 10k Ohm resistor
The USB-C panel mount wiring was given a ‘unique’ extra-male JST plug: not only was a male plug used, but also male pins that stick out were used. This is to prevent accidental short circuits.
The 10k ohm resistor connects between D7 and GND of the Arduino and is used to put the servo in ‘maintenance mode’, allowing for calibration and construction. This resistor is removed for normal operation.
Code
The code in all it’s glory is shown below; a short synopsis of the code’s operation is as follows:
- Everything gets initialised on first boot up.
- The time is read from the RTC, if a minute has passed then:
- The LCD display is updated to the correct time, and
- The lock status is evaluated against the desired time periods.
- Repeat steps 3-4 ad infinitum.
/*    TIMED LOCK BOX - DECEMBER 2023 - HJWWALTERS.COM
      ===============================================
      Hardware:
      DS3231 for the RTC
      1602 LCD with I2C converter for display
      SG90 9g servo for lock

      More information: https://hjwwalters.com/timed-lock-box/
*/

//LIBRARIES
#include <Wire.h>
#include <LiquidCrystal_I2C.h>
#include "RTClib.h"
#include <Servo.h>

#define OPEN    90
#define CLOSED  0

//CREATE OBJECTS
RTC_DS3231 rtc;
LiquidCrystal_I2C lcd(0x27, 16, 2);
Servo myServo;

//GLOBAL DATE/TIME VARIABLES
char daysOfTheWeek[7][6] = {"Sun", "Mon", "Tue", "Wed", "Thu", "Fri", "Sat"};
int pos = 0;          //0 = locked    90 = open
int nowYear = 0;
int nowMonth = 0;
int nowDay = 0;
int nowDayOfTheWeek = 0;
int nowHour = 0;
int nowMinute = 0;
int previousMin = 61; //outside of typical scope to ensure refresh on startup

/////////////////////////////////////////////////////
void setup() {

  //START RTC
  rtc.begin();
  //rtc.adjust(DateTime(F(__DATE__), F(__TIME__)));   //sets time

  //START LCD
  lcd.init();
  lcd.backlight();
  lcd.clear();

  //START & ZERO SERVO
  myServo.attach(9);
  myServo.write(CLOSED);

  //SERVICE MODE - CONNECT 10K RESISTOR BETWEEN PIN D7 & GROUND
  int servicePin = 7;
  pinMode(servicePin, INPUT_PULLUP);
  bool serviceMode = digitalRead(servicePin);
  if (!serviceMode) { //pin pulled low when connected to ground
    lcd.setCursor(2, 0);
    lcd.print("SERVICE MODE");
    lcd.setCursor(4, 1);
    lcd.print("UNLOCKED");
    myServo.write(OPEN);
    while (1);
  }

}
/////////////////////////////////////////////////////
void loop() {

  //GET TIME AND UPDATE VARIABLES
  DateTime now = rtc.now();

  nowYear = now.year();
  nowMonth = now.month();
  nowDay = now.day();
  nowDayOfTheWeek = now.dayOfTheWeek();
  nowHour = now.hour();
  nowMinute = now.minute();

  //CHECK IF MINUTE HAS CHANGES
  if (nowMinute != previousMin) {
    updateScreen();
    lockCheck();
    previousMin = nowMinute;
  }

  //ONE SECOND DELAY
  delay(1000);

}
/////////////////////////////////////////////////////
void updateScreen() {

  lcd.clear();
  lcd.setCursor(1, 0);
  lcd.print(daysOfTheWeek[nowDayOfTheWeek]);
  lcd.setCursor(5, 0);
  if (nowDay < 10) {
    lcd.print("0");
  }
  lcd.print(nowDay);
  lcd.print("/");
  if (nowMonth < 10) {
    lcd.print("0");
  }
  lcd.print(nowMonth);
  lcd.print("/");
  lcd.print(nowYear);
  lcd.setCursor(1, 1);
  if (nowHour < 10) {
    lcd.print("0");
  }
  lcd.print(nowHour);
  lcd.print(":");
  if (nowMinute < 10) {
    lcd.print("0");
  }
  lcd.print(nowMinute);

}
/////////////////////////////////////////////////////
void lockCheck() {
  //set to only open on Friday 17:00 - Sunday 23:59

  pos = CLOSED;   //set lock on box

  //unlock if within parameters
  switch (nowDayOfTheWeek) {
    case 0:   //Sunday
      pos = OPEN;
      lcd.setCursor(7, 1);
      lcd.print("UNLOCKED");
      break;
    case 5:   //Friday
      if (nowHour > 16) {
        pos = OPEN;
        lcd.setCursor(7, 1);
        lcd.print("UNLOCKED");
      }
      break;
    case 6:   //saturday
      pos = OPEN;
      lcd.setCursor(7, 1);
      lcd.print("UNLOCKED");
      break;
    default:
      lcd.setCursor(7, 1);
      lcd.print("LOCKED  ");
      break;
  }

  //action servo
  myServo.write(pos);
  delay(10);

}
What You Don’t See
This web page presents a nicely wrapped and concluded project; however, it doesn’t show all of the late nights and iterative fuck-ups within the 20-day build time.
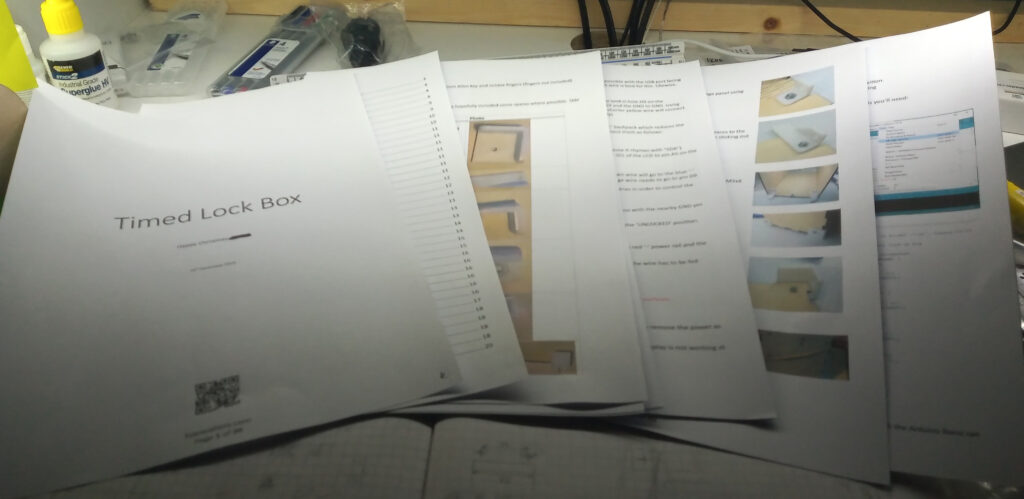
This web page also pales into insignificance when compared against the 19-page instruction manual written for the assembly and operation of the box.
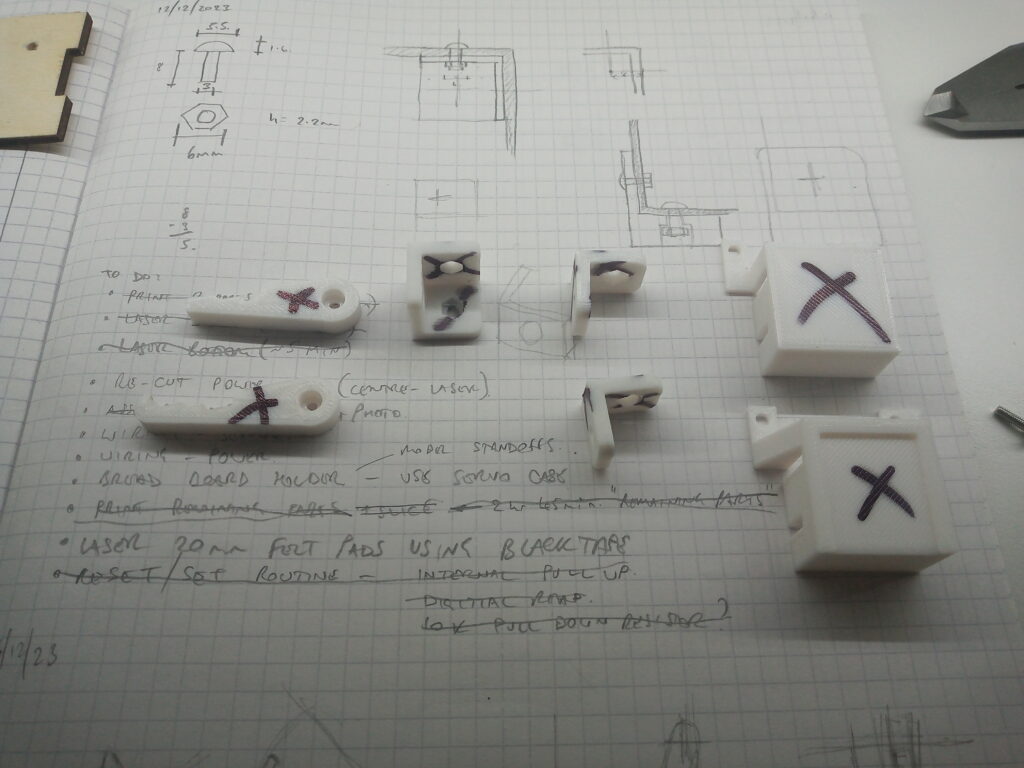
That being said, here are some photos showing you the various design-dead-ends and other behind-the-scenes photos.
Page published: 13/12/2023
Last updated: 28/12/2023