This is a short write up on how to read the commands from an existing infrared remote control, copy the commands, and then duplicate them with an Arduino and an infrared LED.
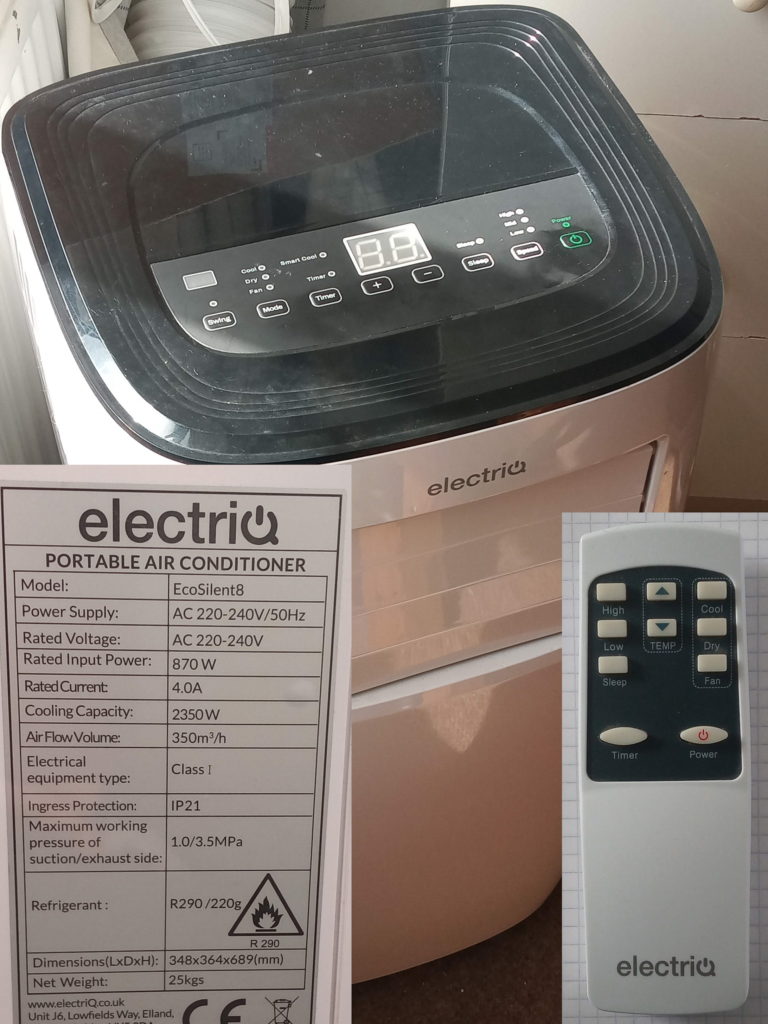
The background and motivation for this project is for the wife and I to both be able to control the A/C unit without having to get out of bed. The original A/C manufacturer didn’t sell replacement remotes, so I decided to make my own.
In the interests of openness and honesty; I originally tried and failed to do this project in May 2023; it’s now August 2024. So if at first you don’t succeed, give up and try again after 15 months.
Preparation: Read the Codes
For a guide on the hook up of the receiver; see this page about how to use an infrared remote control to wake up an Arduino from deep sleep. Thankfully, it’s just three wires.
Once that has been done, load the “ReceiveDemo” example sketch, open up the serial monitor and blast the receiver with the remote you want to clone. Each button on the remote will produce a different “command” code as demonstrated below.
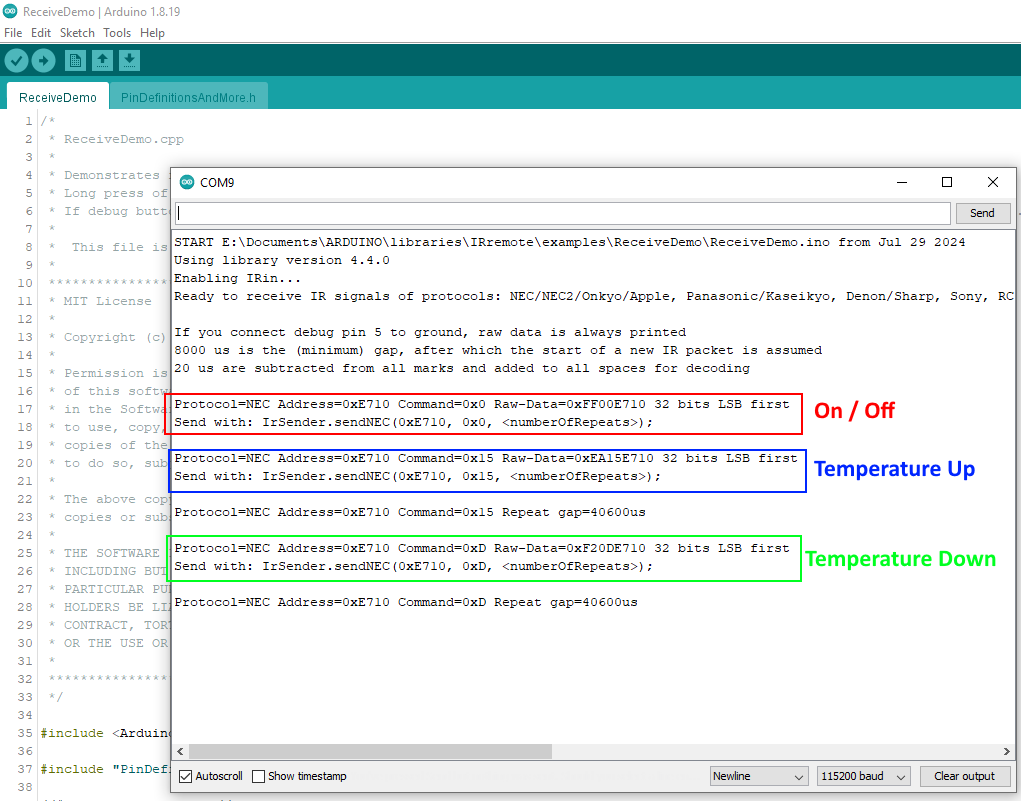
The beauty of this sketch is that it actually tells you how to send the command it received! The only guesswork required is to know the number of repeats; however, ‘3’ seems to work.
Send the Codes
For this example, I’m only interested in turning the A/C on and off, therefore, there is only a single command to send with one button.
Hardware
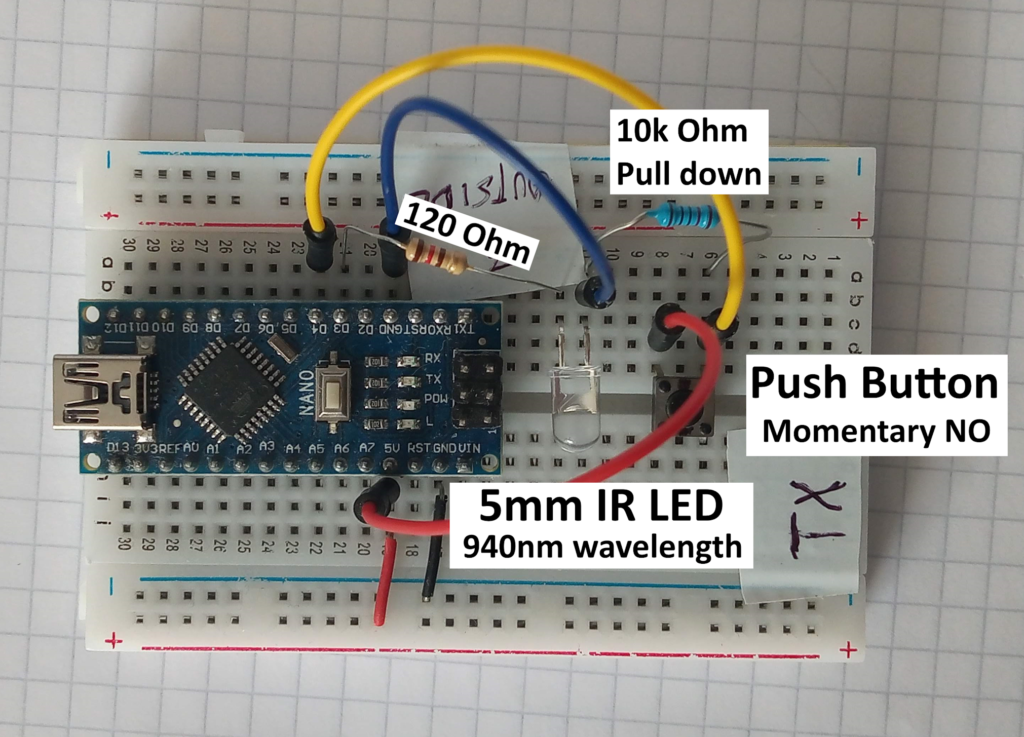
There are two parts to this circuit: The LED to send the signal, and the push button to control when to send the command.
LED Circuit:
Using this datasheet, we can see that the LED has a forward voltage of 1.2V and is rated to 100mA continuous or 1,000mA pulsed.
However the Arduino supplies 5V from the pins and is limited to 40mA maximum current, so a 120ohm current limiting resistor is required.
Therefore, the anode (+) of the LED should be connected to Arduino pin D3, via the resistor.
Button Circuit:
The other section of this circuit is the control button.
For this example, a simple push-to-make normally-open momentary button has been used.
One side of the button is connected to Vcc (5V) and the other end of the button is connected to the Arduino pin D4 with an additional 10k Ohm pull down resistor connected to ground.
Software
Thankfully, the ReceiveDemo sketch used earlier gives us the pertinent section of code needed to duplicate the signals it receives; it’s then just a case of adding some code for the button and you’re good to go.
#include <IRremote.hpp>

#define IR_SEND_PIN 3
#define BUTTON_PIN 4

void setup() {
  pinMode(LED_BUILTIN, OUTPUT);
  pinMode(BUTTON_PIN, INPUT);
  IrSender.begin(IR_SEND_PIN);
}

void loop() {
  bool buttonState = digitalRead(BUTTON_PIN);
  if (buttonState) {
    IrSender.sendNEC(0xE710, 0x0, 3);
    delay(100);
  }
}
Test Run
The proof of the pudding is in the eating. So, below is a short video showing the AC unit being turned on and off by the Arduino based IR remote.
Page created: 03/08/2024
Last updated: 03/08/2024