A quick start guide on using these inexpensive 433MHz RF transmitter and receiver pairs with an Arduino.
This page includes all the pinouts and code needed to send a simple “hello world” message in order to test your equipment.
Hardware – Aerials
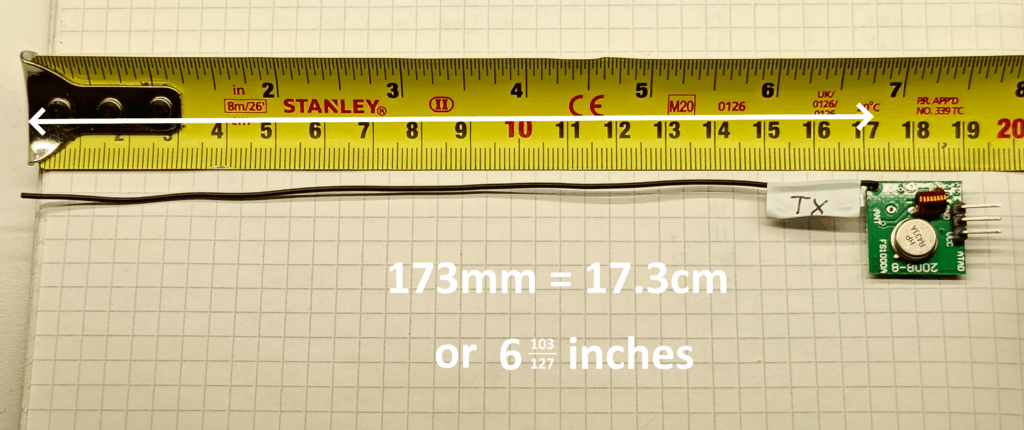
The aerial dimension is critical if you want any range. If you got your aerials sorted then skip to the next section, otherwise buckle up for some quick maths:
The aerial needs to be ‘tuned’ to the radio wave, so take the speed of light (299792458 m/s) and divide it by the frequency of the wave (433Mhz) and you’ll end up with an answer of 0.692 metres. This is the ideal length, however, having a half-wave or quarter-wave aerial length is acceptable.
In this instance, I’ve opted for a more compact quarter-wave aerial = 0.692 / 4 = 0.173m = 17.3cm, as can be seen below
Hardware – Setup & Pinout
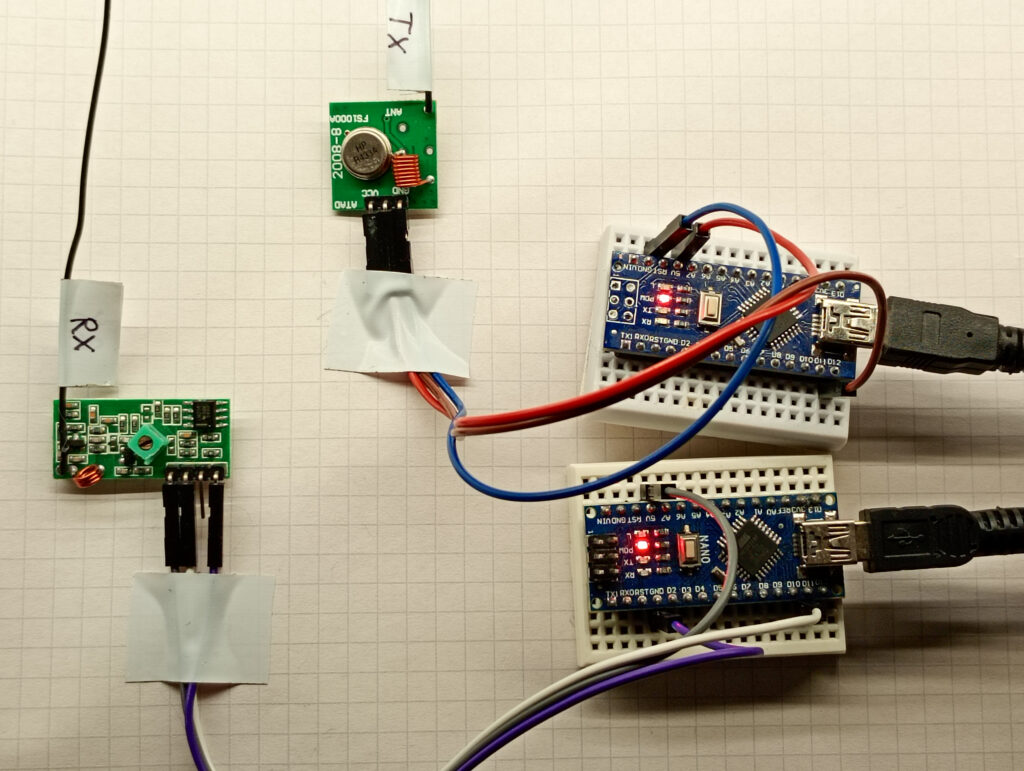
The first photo shows the general test setup with a pair of Arduino Nanos connected to their specific module.
The second photo gives the pinout. The labelling on the transmitter is misleading. The VCC is the CENTRE PIN, not the right hand pin. The rightmost pin, is labelled ATAD (reverse of DATA)

Software
This is just a simple test bit of code that sends a “hello world” message designed to confirm communication. Adding extra elements to the buffer just creates random characters.
Transmit
//TX 433MHZ

#include <RH_ASK.h>
#include <SPI.h> // Not actually used but needed to compile

RH_ASK driver;

void setup()
{
    Serial.begin(115200);    // Debugging only
    if (!driver.init())
         Serial.println("init failed");
}

void loop()
{
    const char *msg = "Hello World!";
    driver.send((uint8_t *)msg, strlen(msg));
    driver.waitPacketSent();
    delay(1000);
}
Receive
//RX 433MHZ

#include <RH_ASK.h>
#include <SPI.h> // Not actualy used but needed to compile

RH_ASK driver;

void setup()
{
    Serial.begin(115200);  // Debugging only
    if (!driver.init())
         Serial.println("init failed");
}

void loop()
{
    uint8_t buf[11];
    uint8_t buflen = sizeof(buf);
    if (driver.recv(buf, &buflen)) // Non-blocking
    {
      int i;
      // Message with a good checksum received, dump it.
      Serial.print("Message: ");
      Serial.println((char*)buf);
    }
}
All being good, set your serial monitor to 115200 baud and you should get a stream of messages coming through at the rate of one per second:
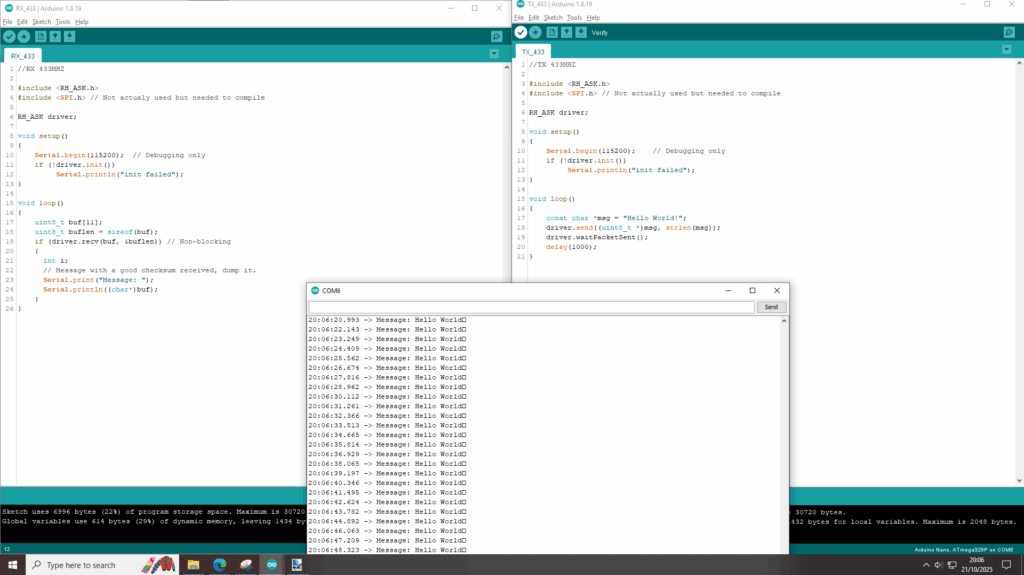
If you see that the Arduino connected to the receiving module is flashing ever second, but there is nothing coming from the serial monitor then check which com port is being read.
Page created: 21/10/2025
Last updated: 25/10/2025